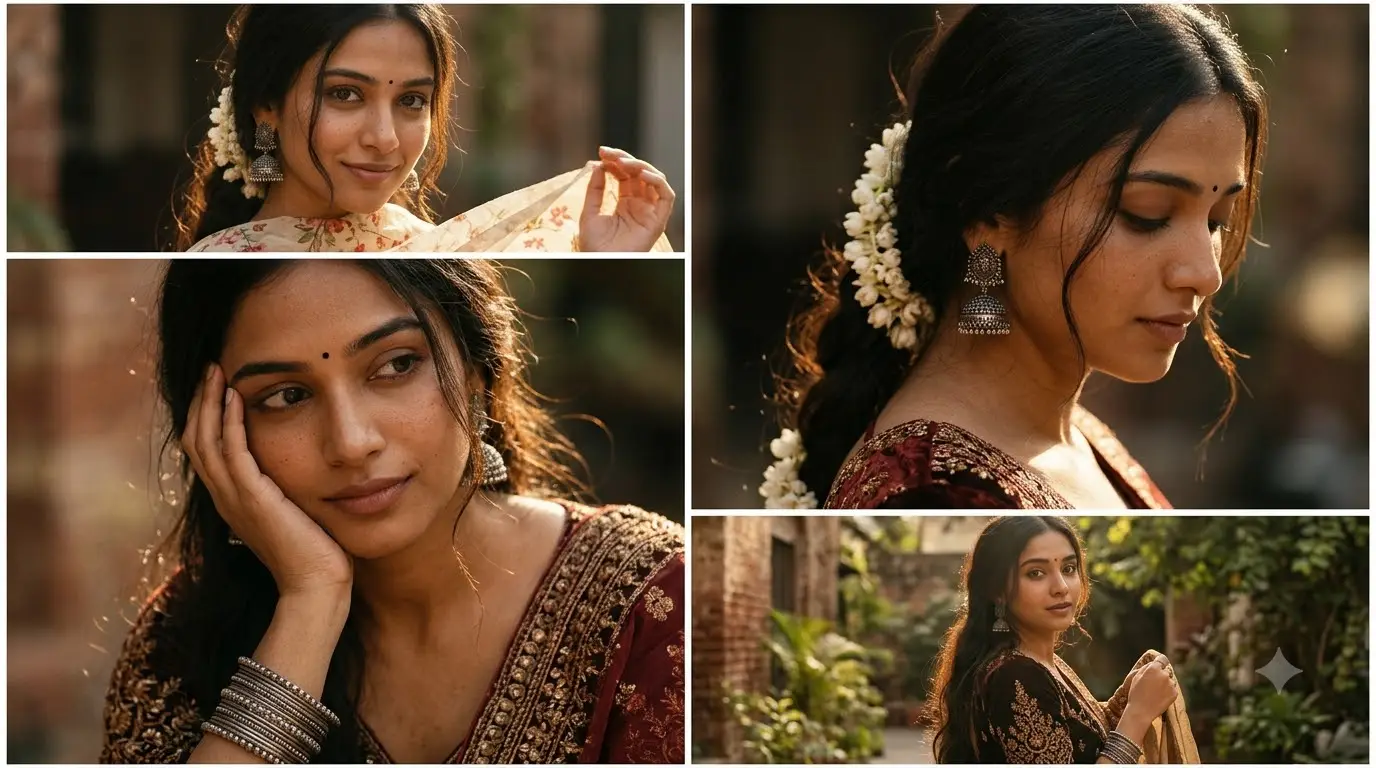
Collage-style portrait prompts are popular on Instagram and Pinterest because one generation gives you a full “photoshoot” in a single image. You get close-ups, side glances, candid moments, and detail shots, all in one frame.
This article breaks down the prompt, shows how it was built, and teaches you how to edit it, improve it, and create your own variants.
The Original Prompt
Create an ultra-realistic, cinematic 9:16 portrait collage of a beautiful young adult South Asian woman arranged in multiple editorial panels with clean white borders. Preserve the same facial identity, facial proportions, natural skin texture, and recognizable features across every panel. She has warm brown skin, long, dark, slightly tousled hair with delicate loose strands framing her face, expressive deep-brown eyes, natural makeup, and a tiny black bindi.
Style her with elegant oxidized-silver jhumka earrings, layered silver bangles, delicate jasmine flowers in her hair, and graceful traditional Indian outfits in cream floral fabric and dark embroidered material. Capture intimate close-ups, gentle smiles, shy side glances, serene profiles, eyes lowered, and candid moments with her hand resting against her cheek or holding the edge of her dupatta.
Use warm golden-hour sunlight, soft cinematic shadows, shallow depth of field, realistic skin details, subtle film grain, and rich earthy tones. Create a cohesive premium fashion-editorial collage with varied camera angles, natural expressions, and romantic storytelling.
Part 1: Anatomy of the Prompt
The prompt has seven building blocks. Once you can see them, you can rebuild or change any of them.
1. Format and Output Type
“ultra-realistic, cinematic 9:16 portrait collage… multiple editorial panels with clean white borders”
This tells the AI three things:
- Quality level: ultra-realistic and cinematic
- Aspect ratio: 9:16, the vertical format for Reels, Shorts, and Stories
- Layout: a collage with white borders, so the model draws separate panels instead of one scene
2. Subject Definition
“beautiful young adult South Asian woman”
The subject is defined by age group, ethnicity, and gender. “Young adult” is a good habit. It keeps the output clearly adult and avoids vague age results.
3. Identity Lock
“Preserve the same facial identity, facial proportions, natural skin texture, and recognizable features across every panel.”
This is the most important line in any collage prompt. Without it, the AI often draws a slightly different face in each panel.
4. Physical Features
“warm brown skin, long dark slightly tousled hair, delicate loose strands, expressive deep-brown eyes, natural makeup, tiny black bindi”
These are the details that make the character recognizable. The more specific they are, the more consistent she looks across panels.
5. Styling and Accessories
“oxidized-silver jhumka earrings, layered silver bangles, jasmine flowers, cream floral fabric, dark embroidered material”
This block sets the cultural look. It uses named items (jhumka, bangles, dupatta) rather than vague words like “Indian jewelry.”
6. Poses and Expressions
“intimate close-ups, gentle smiles, shy side glances, serene profiles, eyes lowered, hand resting against cheek, holding the edge of dupatta”
This list tells the AI what each panel should show. Each phrase works as a mini shot description.
7. Lighting and Photography Style
“warm golden-hour sunlight, soft cinematic shadows, shallow depth of field, realistic skin details, subtle film grain, rich earthy tones”
This block sets the mood. It combines light (golden hour), focus (shallow depth of field), texture (grain), and color (earthy tones).
Part 2: How to Create a Prompt Like This (Step by Step)
Step 1: Decide the Final Output First
Before writing, answer these questions:
- Where will this be posted (Instagram Reel cover, Pinterest, Facebook)?
- Vertical or square?
- One image or a collage?
Step 2: Write the Subject in One Sentence
Use the formula: [age group] + [ethnicity/region] + [gender] + [key vibe]
Example: young adult South Asian woman with a calm, romantic personality
Step 3: Add Identity-Lock Language
Always include a sentence like:
“Maintain the exact same face, features, and skin texture in every panel.”
Step 4: List 5 to 7 Physical Details
Choose skin tone, hair length and style, eye color and expression, makeup, and one small signature feature (like the bindi or a mole). The signature feature helps the AI keep her consistent.
Step 5: Build the Wardrobe and Accessories Layer
Name specific garments, fabrics, colors, and jewelry. Specific nouns beat adjectives.
Step 6: Plan the Panels
Write 5 to 8 different shots, for example:
- Extreme close-up of the eyes
- Side profile with a soft smile
- Medium shot holding the dupatta
- Candid laugh looking away
- Hand-on-cheek portrait
- Detail shot of the jhumka and bangles
Step 7: Add Light, Lens, and Color
Pick one lighting setup, one depth-of-field instruction, one texture, and one color palette.
Step 8: Add a Cohesion Sentence
End with something like: “Create a cohesive premium fashion-editorial collage with a consistent color grade.” This pulls the panels together.
Part 3: The Master Template (With Placeholders)
Copy this template and replace the () fields.
Part 4: How to Edit and Modify the Prompt
Change the Look
What to changeOriginalTry this insteadLightinggolden-hour sunlightblue-hour twilight, soft window light, candlelightMoodromanticmysterious, joyful, nostalgic, regalSettingunspecifiedrooftop terrace, old haveli courtyard, flower marketFilm stylesubtle film grainKodak Portra 400 look, vintage 35mm, Fujifilm tonesColor paletteearthy tonespastel, monochrome, deep jewel tones
Change the Layout
- Number of panels: “6 panels in a 2×3 grid” or “one large hero panel with 4 small panels”
- Border style: white borders, black borders, torn-paper edges, Polaroid frames, film-strip style
- Aspect ratio: 9:16 for Reels, 4:5 for Instagram posts, 1:1 for profile grids, 16:9 for YouTube thumbnails
Change the Subject
Swap the cultural styling block (jewelry, outfit, accessories) and keep everything else. You can create a completely different character this way while the structure stays the same.
Change the Camera Language
Add terms like:
- 85mm portrait lens, f/1.8
- low-angle shot, over-the-shoulder shot, Dutch angle
- macro shot of jewelry, rack focus
Part 5: How to Make the Prompt Better
1. Be Specific, Not Poetic
Weak: “beautiful traditional jewelry”
Better: “oxidized-silver jhumka earrings with small dangling beads”
2. Avoid Conflicting Instructions
Don’t mix “bright harsh midday sun” with “soft moody shadows.” Pick one lighting direction.
3. Describe the Panels Individually (Advanced)
Instead of a general list, assign shots to positions:
“Top left: extreme close-up of eyes. Top right: side profile. Center: large hero portrait. Bottom: three small candid shots.”
4. Add a Negative Prompt (If Your Tool Supports It)
“No extra fingers, no distorted hands, no plastic skin, no over-smoothing, no text, no watermark, no different faces between panels.”
5. Keep the Prompt Focused
Very long prompts can make models ignore details. Aim for 120 to 220 words, and put the most important instructions (identity lock, layout) early.
6. Iterate in Small Steps
Change one element at a time: first the lighting, then the outfit, then the panel layout. If you change everything at once, you won’t know which edit helped.
7. Use a Reference Image When Possible
In tools that support image input, upload your character’s face as a reference. This is the most reliable way to get true consistency across panels and across multiple generations.
Part 6: Prompt Variants
Each variant below is wrapped in { } so you can copy it cleanly.
Variant 1: Classic Rajasthani Heritage
Variant 2: Monsoon Mood
Variant 3: Modern Minimal Fashion
Variant 4: Festive Diwali Night
Variant 5: Vintage Film Nostalgia
Variant 6: Beach Sunset Boho
Variant 7: Royal Portrait Series
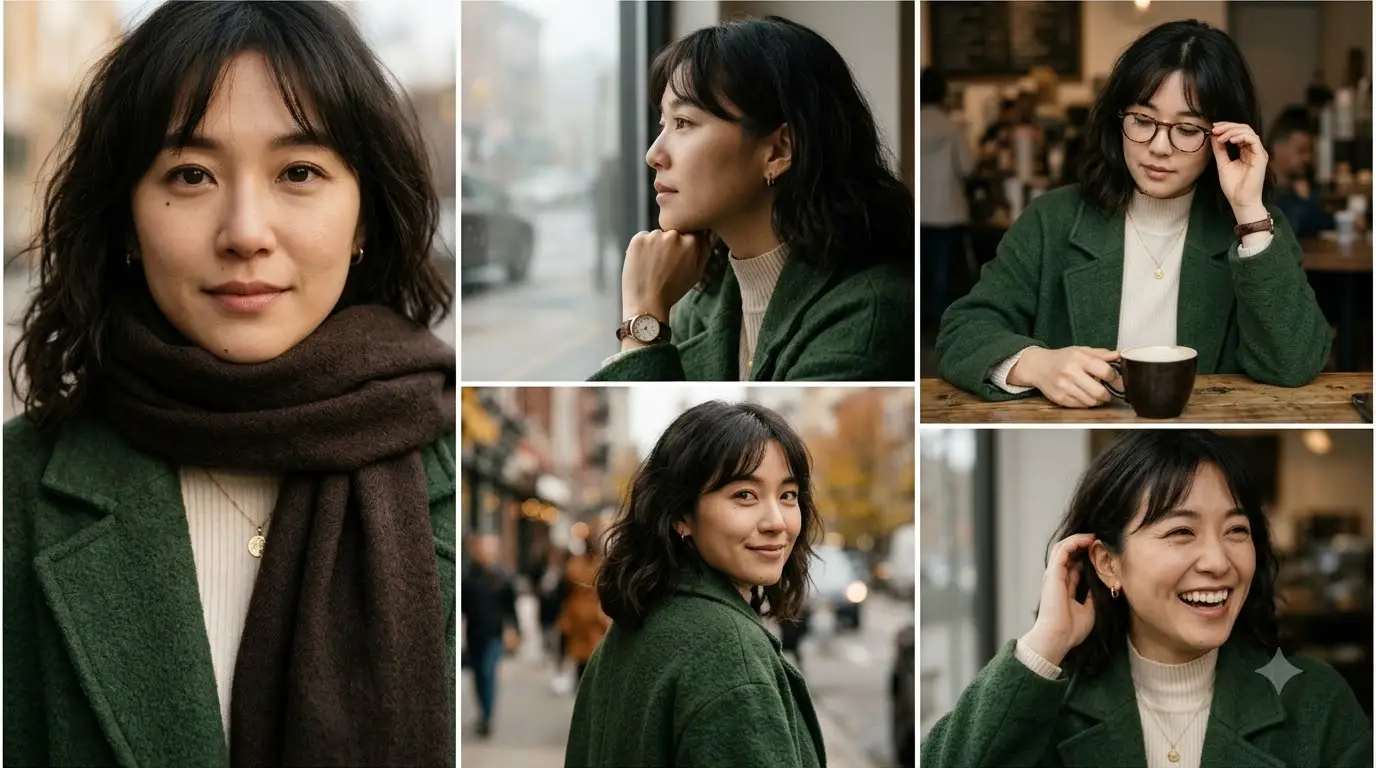
Variant 8: Cozy Winter Story
Variant 9: Blank Custom Template
Part 7: Common Mistakes and Fixes
ProblemLikely causeFixDifferent faces in each panelWeak identity lockRepeat the identity-lock sentence, or use a reference imagePanels look identicalPoses not variedList distinct shots and camera anglesPlastic, over-smooth skinToo much “perfect” languageAdd “natural skin texture, visible pores, subtle imperfections”Messy borders or no collageLayout not clearState “6 panels in a 2×3 grid with white borders”Text or watermark appearsNo negative promptAdd “no text, no watermark, no logos”Jewelry looks wrongVague namingDescribe shape, metal, and size
Part 8: Tips for Different AI Tools
- Midjourney: Use
--ar 9:16and--style rawfor a more realistic look. Keep the prompt tighter. - ChatGPT / DALL·E style tools: Longer, descriptive paragraphs work well. State the aspect ratio in words.
- Gemini image tools: Work well with step-by-step layout instructions and reference images.
- Flux / Stable Diffusion: Add a negative prompt and consider a face-consistency tool such as a reference adapter.
Always test the same prompt in more than one tool, because each one interprets collages differently.
Part 9: A Note on Responsible Use
- Create original or fictional characters. Don’t try to copy the face of a real person.
- If you post AI-generated images, label them as AI-generated, as many platforms now require.
- Give credit to prompt creators (like @aipromptsgenz) when you share or adapt their work.
Quick FAQ
Q: How long should the prompt be?
Between 120 and 220 words works best for most tools.
Q: Can I use this for a male or non-binary subject?
Yes. Change the subject and styling blocks and keep the structure.
Q: Why does the prompt say “young adult”?
It sets a clear adult age range and avoids ambiguous age outputs.
Q: How do I keep the same character in future images?
Save your character description as a reusable block, and use a reference image where the tool allows it.
Conclusion
This collage prompt works because it follows a clear structure: format, subject, identity lock, features, styling, shots, lighting, and a cohesion line. Once you understand these blocks, you can swap any part to create endless variations while keeping the premium editorial feel.
Start with the master template, change one element at a time, and keep a library of your best-performing variants.